
After I had successfully installed VirtualBox I decided to create my first virtual machine and install Windows XP Professional.
I had started VirtualBox by selecting the Sun xVM VirtualBox entry in the System Tools submenu of the Applications menu. Next I clicked on the "blue sun" icon with the text "New" underneath. This opened the "Create New Virtual Machine" dialog window.
Since the first "page" in the virtual machine wizard is just a welcome message, I clicked the Next button.
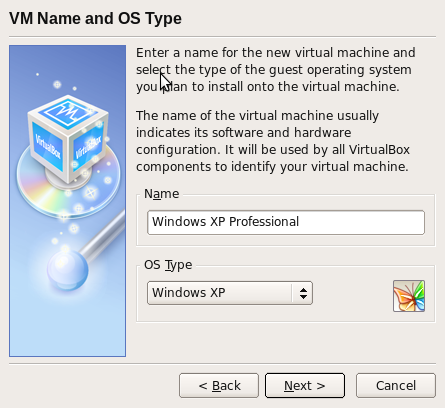
In the second page of the wizard I entered the name of the virtual machine: "Windows XP Professional", selected the OS Type of the guest operating system: "Windows XP", and clicked on the Next button.
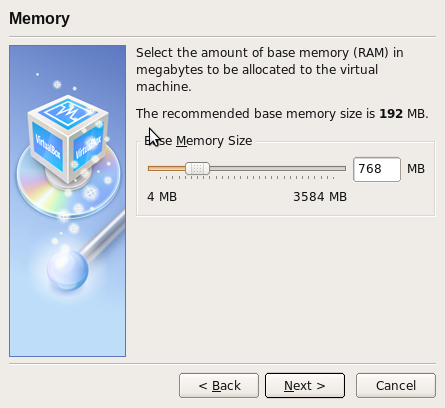
In the third step I selected the amount of base memory (RAM) to be allocated to the virtual machine. Since my Dell Vostro 200 ST has currently 2 GB of memory I decided to set this value to 768 MB, which is in my experience enough for most of the work I do in Windows XP.
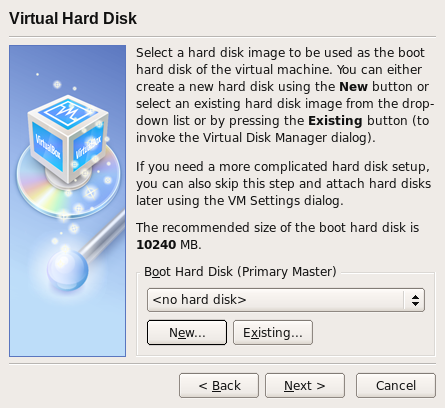
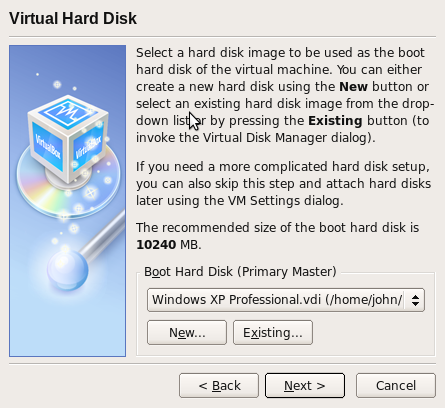
The fourth step allows one to select an existing hard disk image to be used by the virtual machine. Since I wanted to create a brand new image in order to install Windows XP Professional, I selected the "New..." button. This opened the "Create New Virtual Disk" dialog window.
Since the first "page" in the virtual disk wizard is, again, just a welcome message, I clicked the Next button to move to the next step.
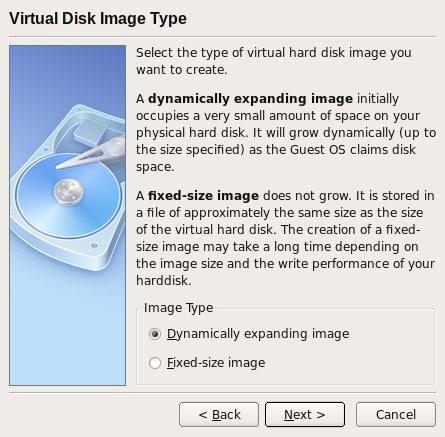
In the second step I selected the image type of the virtual hard disk image. I decided to go with the "Dynamically expanding image" type option.
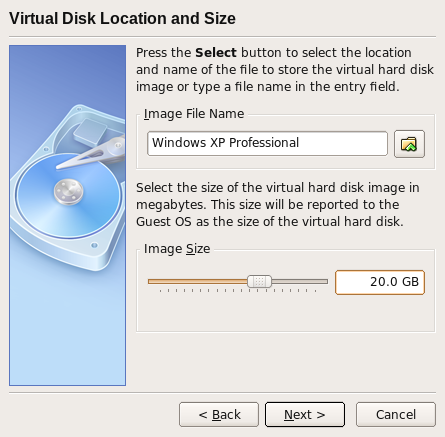
In the third step I selected an image size of 20 GB, which is for my purposes more than sufficient. I decided to go with the default of the image file name: the same as the name of the virtual machine, and clicked the Next button.
The fourth and final step shows an overview of the virtual hard disk parameters selected: type, location and size. I considered the values I had selected correct, and clicked on the Finish button. This closed the Virtual Disk wizard.
Since step four of the Virtual Machine wizard now showed the newly created virtual disk as the default for Boot Hard Disk (Primary Master) I clicked on Next to move on to the final step.
The final step showed a summary of the virtual machine that is going to be created: Name, OS Type, Base Memory, and the Boot Hard Disk. Since I considered the values I had selected correct, I clicked on the Finish button.
After I had created the virtual machine, including the virtual hard disk, I inserted the Windows XP Professional CD ROM into the optical drive of my Dell Vostro. Next I clicked on the CD/DVD-ROM entry of the Details tab in the Sun xVM VirtualBox main window.
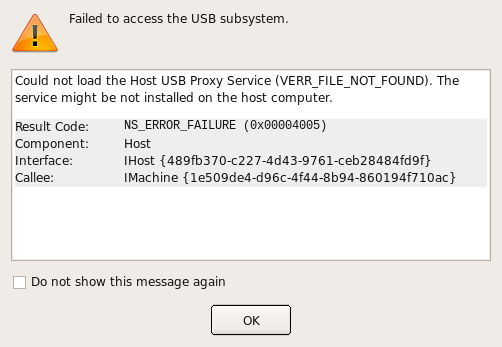
I was greeted with the following warning: "Failed to access the USB subsystem.". Below the warning was given the following explanation:
Could not load the Host USB Proxy Service (VERR_FILE_NOT_FOUND). The service might be not installed on the host computer.
followed by some codes. Since I hadn't taken yet the necessary steps to enable USB in VirtualBox, I decided to ignore the warning, and clicked the OK button.
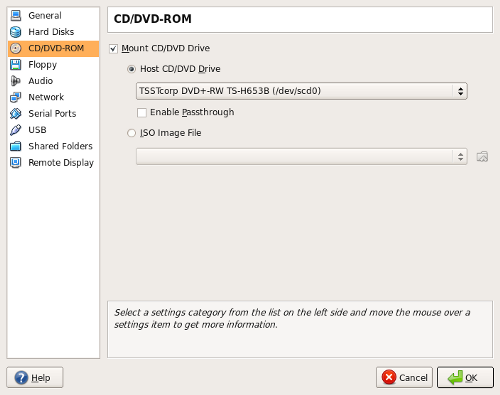
Then the Settings dialog window opened for my virtual machine, with the "CD/DVD-ROM" entry selected. I enabled the "Mount CD/DVD Drive", which selected the host CD/DVD Drive, the actual optical drive, by default. Satisfied with this default I clicked the OK button.
Note: if you have downloaded an ISO image of a guest operating system it's not needed to burn the image to a CD (or DVD) first. The ISO image file can be selected via the CD/DVD-ROM entry.
The Details tab in the main window of Virtual Box got updated, and I clicked the large green arrow to start the virtual machine, and was greeted with an error message stating: "Failed to open a session for the virtual machine Windows XP Professional".
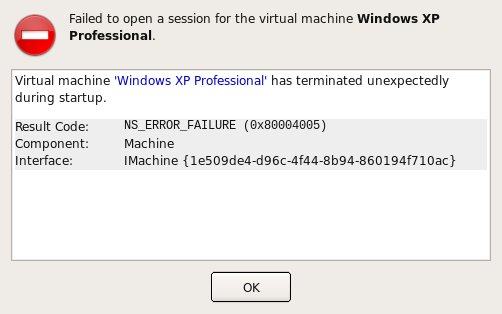
Below the error was given the following explanation:
Virtual machine 'Windows XP Professional' has terminated unexpectedly during start up.
followed by some codes. Another dialog reported "VERR_VM_DRIVER_NOT_INSTALLED (rc=-1908)" with instructions to re-setup the kernel module by executing:
/etc/init.d/vboxdrv setupwhich I did:
sudo /etc/init.d/vboxdrv setup
[sudo] password for john:
 * Stopping VirtualBox kernel module
 *  done.
* Recompiling VirtualBox kernel moduleNote: if you have followed my VirtualBox installation instructions you should not get those aforementioned error messages. I've included them for completeness sake.
Next when I started the virtual machine a window opened, explaining that I had the Auto capture keyboard option turned on, and that I could use the host key, Right Ctrl, to uncapture the keyboard. I ticked "Do not show this message again", and clicked the OK button.
A new window opened, and shortly after I got a blue screen with "Windows XP Professional Setup". I pressed Enter to set up Windows XP. When the Windows XP Licensing Agreement showed up, I pressed F8.
Note: after the licensing agreement, Windows XP Professional Setup shows the virtual hard disk you created. This is a file on the actual hard disk of your computer. Windows XP is not installed directly on your hard disk but on the virtual disk, a file, created by VirtualBox.
When the setup program showed the existing partitions, in my case just the entire virtual hard disk, I pressed Enter to select this disk for use by Windows XP without creating any partitions.
Satisfied with the default in the next step: "Format the partition using the NTFS file system", I pressed Enter to continue.
Note: The parition is the virtual disk file, not a partition of the actual hard disk in your computer.
Next, set up formatted the partition (read: the virtual disk), analyzed the disk, copied files to the Windows installation folders, and rebooted the computer (read: the virtual computer).
After the reboot the installation continued using the graphical user interface. I entered the values I desired in the requested fields, the product key, etc. and the set up program moved on to the "Installing Windows" step.
After another reboot, and clicking OK twice to have the screen resolution adjusted I am greated with "Welcome to Microsoft Windows". I click Next, and turn on automatic updates. In the next step I stick with the default: "Yes, this computer will connect through a local area network or home network", and click Next.
In the "Ready to register" step I select "No, not at this time", and click the Next button. In the next screen I created just one account, but not using my name. The reason for this is that I want create later on an additional user with limited user rights with my name to use for all tasks that don't require Administrator rights. This is a highly recommended good practice.
Shortly after I had clicked the "Finish" button, the Windows XP desktop appeared and I was ready to create an additional limited user account, run Windows Update, and install software like Mozilla Firefox, Perl, TextPad, etc.