
Today I installed the Ubuntu 5.10 distribution in a virtual machine. A few people asked me if this was possible, and if so, how to do it. So I decided to give it a try, also because I have my development machine in a dual boot set up, using Kubuntu, besides Windows XP Professional, and I want to give the virtual set up a try because then I can run a GNU/Linux distribution next to Microsoft Windows XP.
I already downloaded the Ubuntu ISO last Saturday, and the MD5SUMS file. Today I checked the ISO file:
md5sum ubuntu-5.10-install-i386.iso
126751a2dc5528c2f9044d9e4ee36d61 *ubuntu-5.10-install-i386.iso

type MD5SUMS

7fbe948be484ba2f4740ab6113890652  ubuntu-5.10-install-amd64.iso
126751a2dc5528c2f9044d9e4ee36d61  ubuntu-5.10-install-i386.iso
8886a26a1da1daa3669ed6e1253bd93b  ubuntu-5.10-install-powerpc.iso
8523ee4b5490c9b77ac4ec5e5a12b2f5  ubuntu-5.10-live-amd64.iso
49f36f8aef009d6403360de23b5a47d4  ubuntu-5.10-live-i386.iso
752c8d641ca486955c7747cac1c8a305  ubuntu-5.10-live-powerpc.iso
As you can see, the sums are identical. I recommend to always check files you download if an MD5SUM or any other kind of checksum is given.
Next, I created a 2 GB virtual disk, using Qemu as described in Creating an XP Pro VM for the free VMware Player as follows:
C:\Program Files\Qemu>qemu-img.exe create -f vmdk Ubuntu.vmdk 2G
Formating 'Ubuntu.vmdk', fmt=vmdk, size=2097152 kB

C:\Program Files\Qemu>start .
The last line is a fast way to open the current folder with Explorer to make the next steps easier: I created a folder Ubuntu under "My Virtual Machines", a sub folder of "My Documents" and moved the Ubuntu.vmdk I created, and the Ubuntu ISO file I downloaded, into this folder.
Note: I have made several empty VMware virtual disk files of various sizes available as a single 21 KB download.
Next, I created in the Ubuntu folder a text file Ubuntu.vmx with the following content:
config.version = "8"
virtualHW.version = "3"
ide0:0.present = "TRUE"
ide0:0.filename = "Ubuntu.vmdk"
memsize = "256"
MemAllowAutoScaleDown = "FALSE"
ide1:0.present = "TRUE"
#ide1:0.fileName = "auto detect"
#ide1:0.deviceType = "cdrom-raw"
ide1:0.fileName = "ubuntu-5.10-install-i386.iso"
ide1:0.deviceType = "cdrom-image"
ide1:0.autodetect = "TRUE"
floppy0.present = "FALSE"
ethernet0.present = "TRUE"
usb.present = "TRUE"
sound.present = "TRUE"
sound.virtualDev = "es1371"
displayName = "Ubuntu"
guestOS = "Ubuntu"
nvram = "Ubuntu.nvram"
MemTrimRate = "-1"
ide0:0.redo = ""
ethernet0.addressType = "generated"
uuid.location = "56 4d 5c cc 3d 4a 43 29-55 89 5c 28 1e 7e 06 58"
uuid.bios = "56 4d 5c cc 3d 4a 43 29-55 89 5c 28 1e 7e 06 58"
ethernet0.generatedAddress = "00:0c:29:7e:06:58"
ethernet0.generatedAddressOffset = "0"
tools.syncTime = "TRUE"
ide1:0.startConnected = "TRUE"
uuid.action = "create"
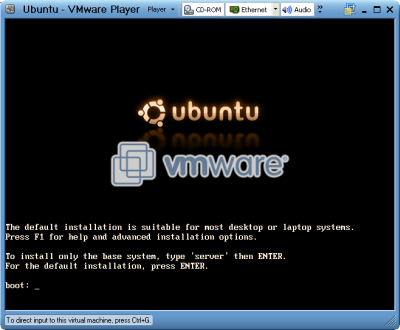
checkpoint.vmState = ""As you can see, the second virtual IDE device points to the Ubuntu install ISO file. This way there is no need to burn the Ubuntu ISO to a CD first. After saving the Ubuntu.vmx file, double click on this file, and the Ubuntu installation process should start.
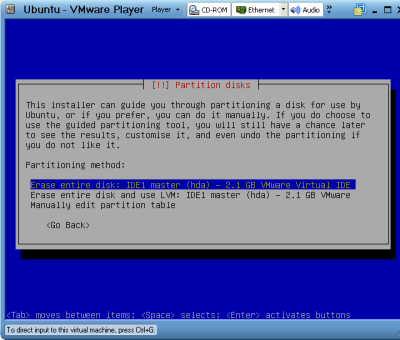
When the partition disks menu appeared I selected the first option: "Erase entire disk: IDE1 master (hda) - 2.1 GB VMware virtual IDE". Make sure that the description you see is similar before you press Enter (ok, I am a bit paranoid). The installer creates and ext3 and swap partition that suits your (virtual) machine configuration.
After roughly 20 minutes the first installation stage was finished, and the installer tried to reboot the virtual system. I waited for some time, but the reboot didn't seem to happen, I kept seeing: "Please stand by while rebooting the system", followed by "[4295504.601000] Restarting system."
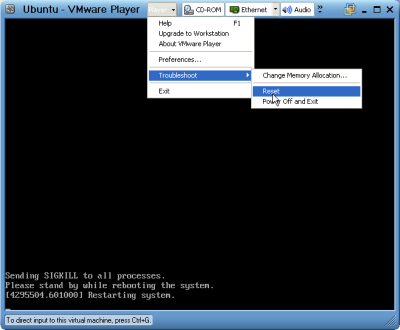
So I decided to reboot the virtual machine manually by selecting the Reset option in the Troubleshoot submenu of the VMware Player, and this worked fine.

After another 20 minutes I got the Ubuntu login screen showing up in the VMware Player. I logged in and did some tests (opening a site using Firefox). Sound was working fine; before I got the login screen I heard some kind of percussion, and after entering my password I heard a pleasant tune.
Remember, if you want to use the actual CD player from Ubuntu running inside the VMware player, you have to delete the following two files from Ubuntu.vmk after you close the VMware Player:
ide1:0.fileName = "ubuntu-5.10-install-i386.iso"
ide1:0.deviceType = "cdrom-image"
and uncomment the following 2 lines by removing the # sign:
#ide1:0.fileName = "auto detect"
#ide1:0.deviceType = "cdrom-raw"
I also tried if rebooting Ubuntu works after the installation was completed, but got the same problem as described above. Luckily one doesn't have to reboot a GNU/Linux install often.
Edit: I have dedicated a small but growing section of my site to the VMware Player.