
If you want to send a picture to someone via Windows Live Messenger, the easiest way to do so is is to drag the file from a folder and drop it into the area you type your instant messages. However, if you accidentally miss the typing area, you might end up with the image as a background of your conversation window. This tutorial explains how to get your default background back.

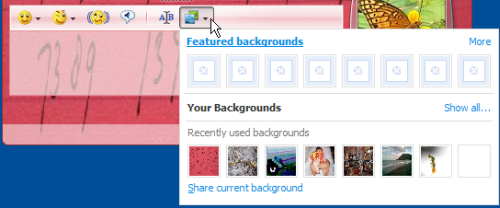
First, move the mouse pointer over the background selection button, which is located just above the typing area, and looks like two squares, one overlapping the other. Press the left mouse button to open the background menu and click on the "Show all..." option (middle, right).

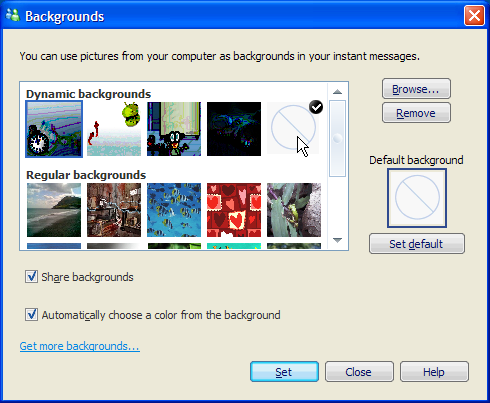
This will open the Backgrounds dialogue window. Next, move the mouse pointer to the dynamic background (or regular background) that has a circle and a diagonal line in it. If it's the default, the background has also in the right top corner a black circle with a tick mark.
If you hold the mouse pointer above this background a yellow tooltip shows up with the text "(none)".
Select this background, and click on the Set button at the bottom of the Backgrounds dialogue window to set it as the background for your conversation window. Now the background should be gone, but you might have ended up with a background color you don't like, if the background color was chosen from the background image.

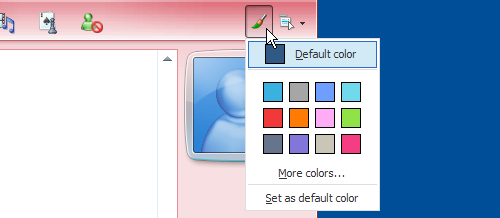
To get the default background color back, first move the mouse to the top right of the conversation window, and click the left mouse button when the mouse pointer is over the paint brush symbol.
This opens the "Change color scheme" menu. Finally, click on the first entry in the menu: "Default color", and your conversation window should be back to normal.
Of course you can use the above steps to select a different background and/or color scheme as well.