At the end of the day I had decided to fix the heatsink issue in my Compaq Presario myself. Around 4 o'clock, when Esme went out to do some shopping I asked her to buy thermal grease at the Steren shop, and a small bottle of isopropyl alcohol to remove the old thermal grease.
Below follow all the steps in case you have the same or similar issue: removing the motherboard from a Compaq SR1505LA, cleaning the heatsink and North Bridge, soldering a new clip - to secure the heatsink - into place, and putting everything back together. Let me know if this blog entry was helpful, especially if you encountered this problem with a Compaq Presario SR1505LA or similar model, or a computer using an Asus motherboard.
First, remove the power cord from the computer, and all other cables: keyboard, mouse, video, network, usb, etc. Then unscrew the two thumbscrews on the back of the Compaq securing the left side panel. Slide the side panel to the back of the computer, remove it, and put it aside. Next, put the computer with its right side on the working surface you're using.
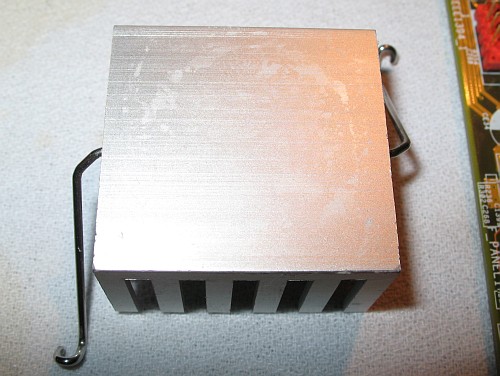
Carefully remove the dangling heatsink by unhooking the metal used to keep it in place from the remaining clip, in my case this was clip 1. Put the heatsink out of place. If you have someone nearby willing to help you, ask him or her to clean the old thermal grease off the heatsink using cotton swabs and the isopropyl alcohol. In my case Esme was willing to help, and it took a lot of effort to clean all the old thermal grease off the heatsink (even when I helped her carefully with a plastic spoon I had given a straight and sharp edge with a hand-file).

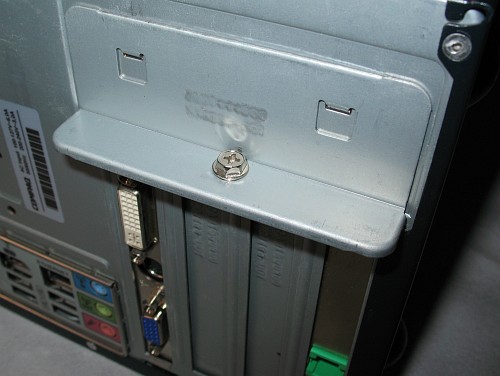
Next, remove the PCI cards (if any). The PCI cards are locked in place with a piece of metal secured with a single scew (see photo below). When you remove each PCI card, avoid touching any components or traces. When I removed the cards, I rested my arm on the metal of the computer case to provide avoid static discharges. Remember, only work inside the computer when you have disconnected the power cord, and all other cables.
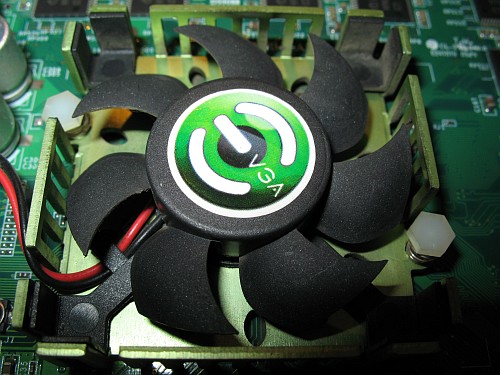
Since the AGP graphics card, an EVGA e-GeForce FX 5500, had gathered quite some dust, I used compressed air to remove all dust. Highly recommended to do this outside, in the open. I used an artist paint brush to prevent the fan from spinning when I cleaned it using the compressed air.
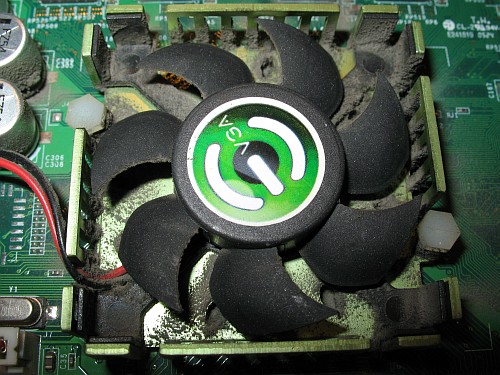
I also had to clean the underside of the videocard, quite some dust had gathered there as well. Notice in the photo above that not only the cooling fan, but also nearby components had collected quite some dust, and how most of it is gone in the photo below.
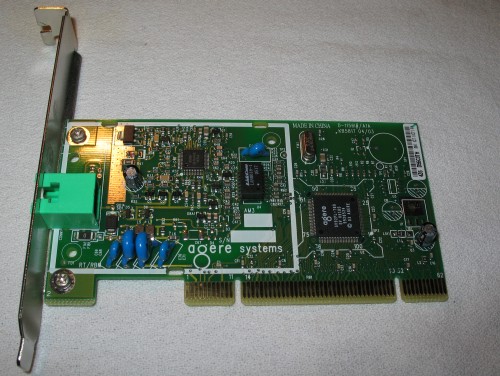
The Compaq Presario SR1505LA came, when I bought it, with an Agere PCI fax-modem card. Since I had never used it, and didn't forsee any use for this card in the future, I decided to remove it, clean it, and store in in a safe place. Since I had added the EVGA graphics card as an upgrade myself, I still had a metal placeholder to cover the empty spot left by the fax-modem card later on.
The next step consist of unplugging a lot of cables from the motherboard, and unscewing the motherboard so it can be lifted out of the computer case. While it might be possible to solder a new clip back by soldering on the component side, I don't recommend this. In order to keep track of the location of each cable, I made a rough sketch of the motherboard in a noteblock, numbered each connector that had a cable attached, and if possible marked the cable as well using a pen with waterproof ink. The illustration given below is a cleaned up version, drawn using Xara Xtreme.
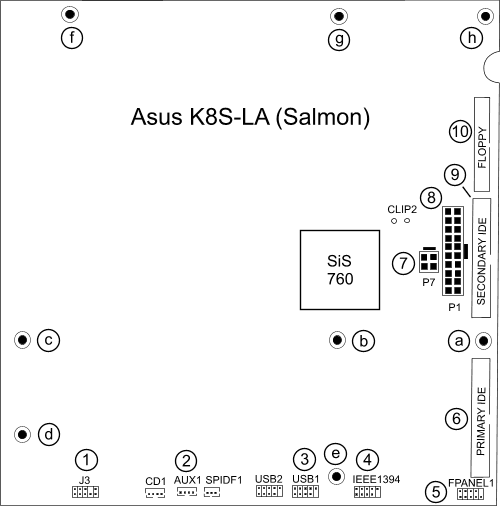
So first remove cables 1-10 (in order), mark each cable clearly if there might be confusion possible. Notice that in order to remove 7 (P7) and 8 (P1) you have to press a clip to the side of the plug, marked with a black rectangle in the above drawing.
If all cables have been removed out of the way, carefully remove screws a-h, ten in total. Whenever I remove scews I always put them on a flat surface in exactly the same pattern as they were originally located, because not all screws might have equal length - I learned this while repairing Atari 520ST / 1040ST computers back in the 90's. Mixing up "back" and "front" scews resulted in bumps in near the keys. In this case the precaution was not needed, yet I think it's a good habit to stick with.
The screw marked h in the drawing was quite hard to remove, because there was not much room for the Phillips scewdriver I used. But I managed to unscrew it, without the need to disassemble the computer even further. After that it was not hard to lift the motherboard out of the computer case. Again I rested my arms on the metal parts of the computer case to avoid static discharge.
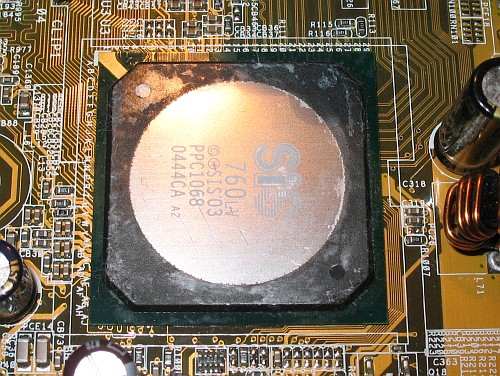
Next I started with removing the old thermal grease off the North Bridge (SiS 760) using cotton swabs dipped into isopropyl alcohol. Esme was almost finished with her task: cleaning the heatsink. I helped her a bit with a plastic spoon, so she could help me with the SiS 760.

I also tried the modified plastic spoon on the top of North Bridge to remove the larger bits, but I recommend not to do this; I managed to make several minor scratches on the metal of the top cover of the SiS 760. Also, be very careful not to apply too much pressure while cleaning the top of the chip.
It took a lot of effort to get all the old thermal grease of the SiS760. Esme helped me out, and after more than 20 minutes of careful rubbing with cotton swaps, I declared the North Bridge clean.
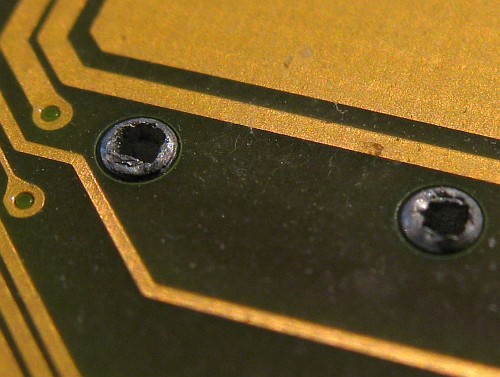
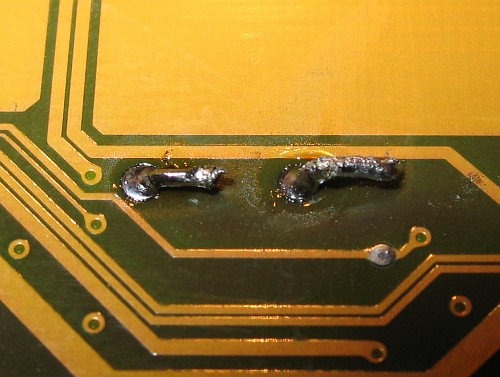
Immediatly after I had removed the motherboard form the computer case, I had inspected the underside of the Asus K8S LA. And it was clear that the locking mechanism of the heatsink had managed to pull the clip out of the motherboard, as you can see in the photo below:
I had already checked the inside of the computer case for the missing clip, but no luck; or maybe it was luck because I didn't trust the clip enough to solder it back in place if I had been able to find it.
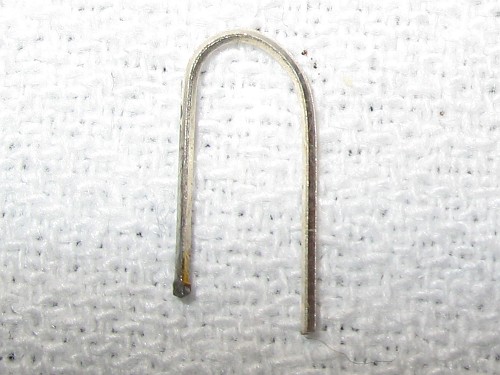
When I made my UV scorpion detector with UV LEDs I kept most of the cut-off leg parts of the LEDs, because I had the feeling that some might come in handy one day. So I bend one leg into something resembling the clip that was still in place and soldered it to the Asus motherboard.
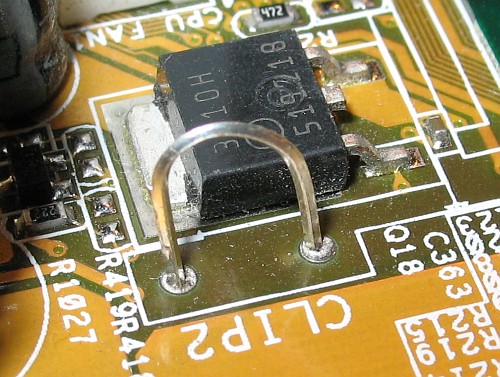
Before I soldered the clip into place, I pushed the tips of the legs of the clip sideways to make sure that the clip couldn't be pulled from the motherboard as easy as the original one. Because there was a copper trace close to one leg, I pushed both tips in the same direction.
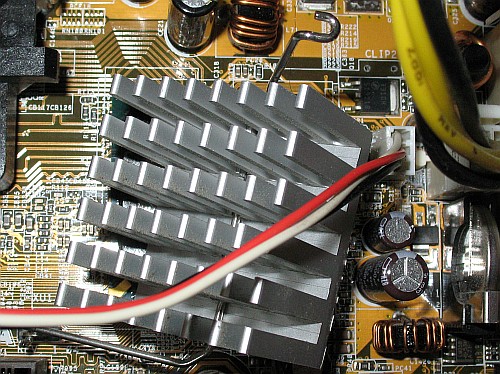
With the new clip in place it was time to apply a new, thin layer, of thermal grease Esme had bought in the Steren shop (LIM-TER, standard silicon-based heat-grease, 1 oz / 28 g)
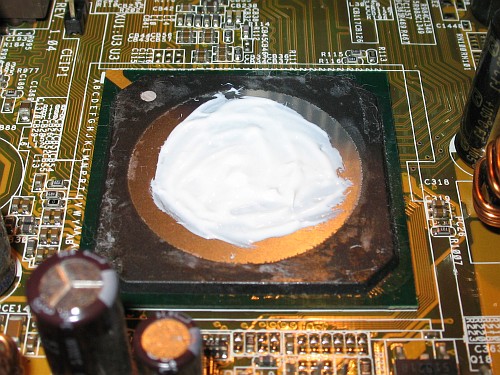
I used a cotton swab to spread out the thermal grease, see above photo. Note that I probably used a little too much. Next I used the heatsink to spread out the thermal grease even more by pushing and rotating it a little to the left and right.
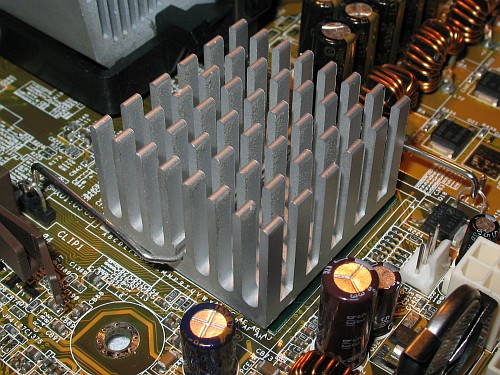
When I was sure that the grease was spread out as good as possible I locked the heatsink back in place. The replacement clip, as expected, stayed in place.
After I had placed the heatsink back into place, I put the motherboard back into the computer case, and screwed the eight screws back in place. After I had tightened the screws I put the cables back in reverse order. Then I put the AGP graphics card back into place, and the PCI locking bar.
Next I reconnected the computer, with the side panel not yet into place, and turned it on. It worked! I was somewhat afraid that I had applied now and then too much pressure when cleaning the SiS760, but all was well. So I turned off the computer, and put the side panel back in place.