
Sometime ago I bought a BenQ DW1650 16x DVD ReWriter. Originally I installed this rewriter in Esme's computer, and moved the DVD reader from her computer to mine, a Compaq Presario SR1505LA. However, last week I decided that it would be much easier to have the DVD rewriter in my computer instead of moving files to Esme's computer in order to burn them on DVD.
So today I put the BenQ DVD rewriter in my computer. I had this originally planned for last Saturday, but keeping a blog up to date takes a lot of time. Anyway, I decided to write the instructions down and include photos of most steps in this blog entry. To make the photos more accurate I first put the CD-ReWritable that came with the Compaq Presario SL1505LA, a TS-H292 designed by Toshiba Samsung Storage Technology back in its place since it was replaced with the LG CD-Rewriter and DVD-ROM combo from Esme's computer.
First, check the CD-ReWritable if it has a CD inside. It happened to me at least once that I removed a drive while it still had a CD inside. Then disconnect the powercord of the computer, and unscrew the thumbscrew that holds the left side panel. Slide the side panel to the back of the computer, remove it, and put it aside.
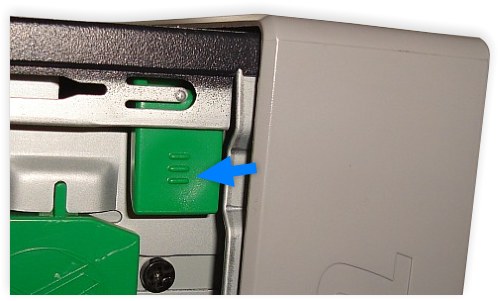
Next, remove the front panel: press the two black tabs under the drive bays outward and pull the lower part of the front panel a little away from the computer. Then push in the green tab close to the top of your computer and the top of the front panel, and pull the top part of the front panel away. It should come off easily. You might ask someone to give you a hand so that when you push outward the black tabs he or she pushes the green tab and pulls away the front panel.
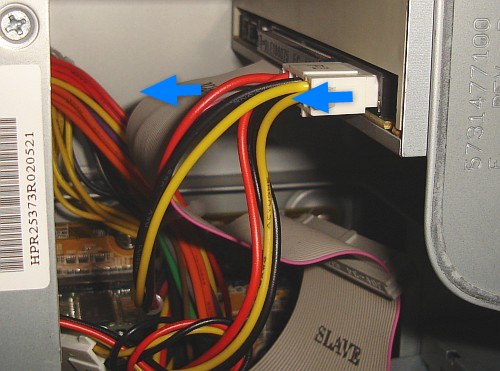
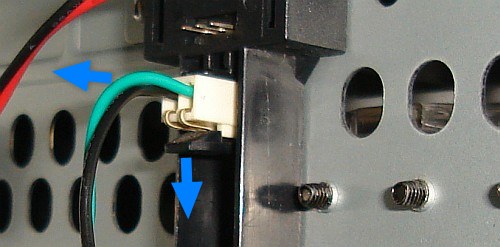
Next, remove the cables connected to the CD-ReWriteable. The power supply plug needs quite some force. Make sure you hold it by the sides, between tumb and index finger, and pull. Be careful though to not use too much force otherwise your hand might bang against the power supply and you might hurt yourself.
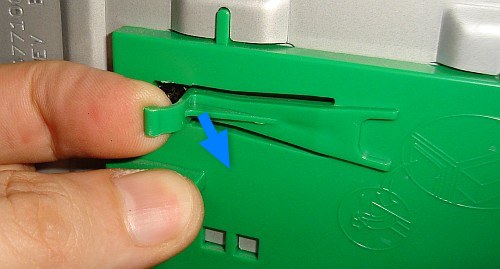
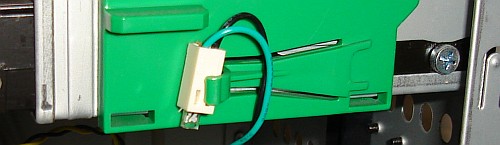
Next, locate the lever in the green plastic side panel that locks one black screw in the side of the drive to be removed. Rest your thumb on the green plastic and with your index finger just pull the lever a little away from the side. The illustration on the plastic side panel suggests that you need to pull it away a lot, but just a little is enough to unlock the screw.
After the power cable has been unplugged, carefully unplug the flat cable as well.
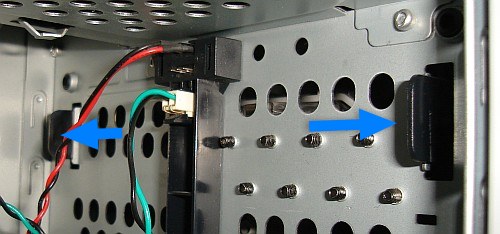
Next, locate the green lever that locks the left hindmost black screw of the CD-ReWritable. While pulling this lever, use your other hand to slide the drive out of its bay. This might require some force. Make sure you slide out the drive, don't wiggle it from side to side.
After you have put the drive out of the way, it might be a good time to clean the inside of your computer and get rid of the dust bunnies that have settled there.
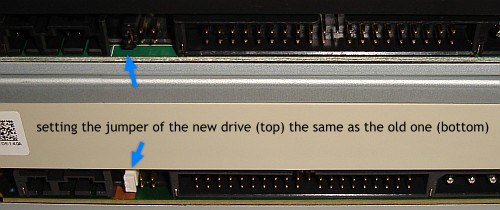
Next, set the jumper on the new drive the same way as it is on the old drive. In my case, the old drive, a TS-H292, had the jumper in the cable select position. So I copied this setting on the new drive, a BenQ DW1650 16x DVD ReWriter.
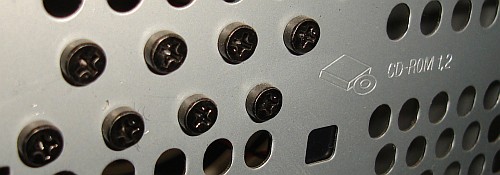
Next, I move the four black scews, 2 on each side, from the old drive to the new one. Make sure that you put them into the holes closest to the bottom of the drive. In case you need a spare screw, there are several black screws available from the metal front part that was covered by the plastic front cover.
With the four screws in place, slide the new drive into place. Again, some force might be needed, and again don't wiggle the drive from side to side. Make it slide in straight. Notice that the drive sticks out a bit because the front panel is not in place. If all went well the left hind most black screw should be locked by the green lever.
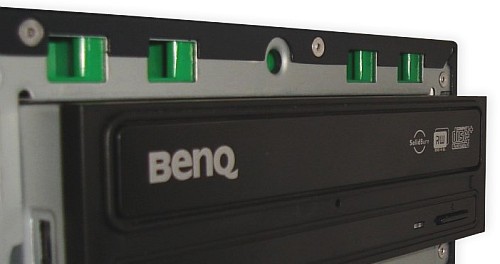
Finally, put the plastic front panel back in place.
One of the first things I did to my then new Compaq Presario SR1505LA was removing the green power on LED from the front because the green light coming out of the front of the computer annoyed me a lot.
First, remove the green LED by pushing the black tab that locks in into place a little down while carefully pulling the green LED away.
Next hook the housing of the green power on LED behind the green lever that can be used to unlock the screw that holds the hard disk into place. I have the power LED in this place for months, and it seems safe enough. Instead of a bright green light coming from the front of the computer I now have a green glow coming from the ventilation holes in the side panel. Talking about the side panel...
Put the side panel back into place, and tighten the thumbscrew that holds the side panel in place. Turn on the computer and log into an account with Administrator rights (assuming Windows XP). The operating system should recognize the new drive. Also, a good test is to install the burning software from a CD ROM put into the new drive, if your drive came with software on CD.
A final note regarding the BenQ DW1650 16x DVD ReWriter: the first DVD I burned, Imation DVD+R 8x, failed. From what I understand the BenQ learns new media, and all following DVDs I burned, same media, didn't cause any problems so far. It might have been a bad DVD, or that the drive had to discover the exact parameters for burning this kind of media, but I do recommend to verify each DVD or CD you burn.