

Today, after reading an article on Photography in the Ultraviolet spectrum (Instructables) I decided to give taking photos of scorpions under UV light another try. Most scorpions do "glow" under UV light (black light), a process called fluorescence. However, my camera is quite sensitive to UV light, resulting in a lot of additional blue in the photo. As a UV light source I used several UV LEDs and the camera is a Sony Cyber-Shot DSC-S600.
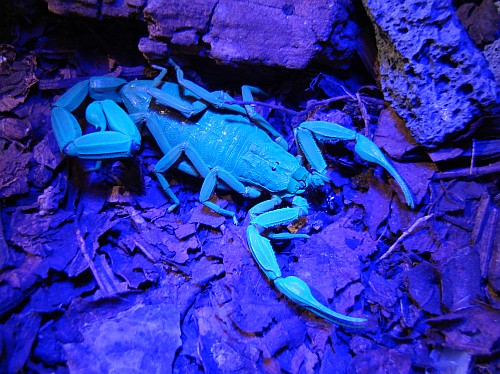
In the above photo he fluorescence effect is lost due to the UV interpreted as blue by the digital camera overruling the actual yellow-green color emitted by the scorpion's exoskeleton
The best solution to stop the camera from being sensitive to UV light is using a filter that blocks out all UV light. Since I didn't have such a filter yet and I doubt there is one that fits to my camera, I decided to use the next best thing I had available: a piece of colored cellophane. Probably what would work the best is a piece of exactly the same color as the scorpion emits when under UV light. The closest color we had in the house was a kind of orange. A bit of experimenting showed that using two such pieces worked the best.
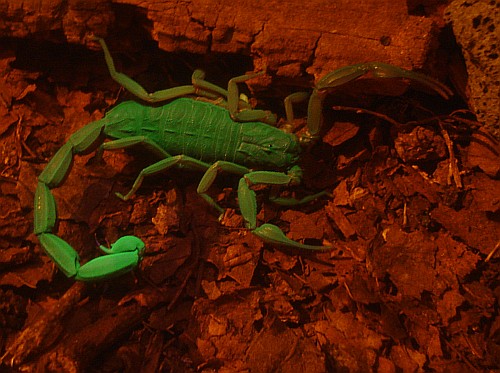
For the above photo I used an ISO setting of 80, which makes the exposure time for the above 1 second. In my experience scorpions don't like UV light very much, and after a short time walk away to avoid it. This means that it's very easy to get a blurred image because of the scorpion moving suddenly out of the UV light.
Note in the above photo that the actual tip of the stinger doesn't glow. It looks like its cut off but a closer looks shows that it appears black under UV light.
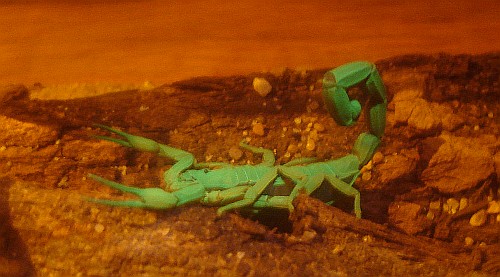
The above photo suffers a bit from this problem, making the photo less sharp. A solution is to add an additional normal light source, especially since the fluorescence is quite strong.
Another, perhaps even easier solution is to do the filtering in software. I use Irfanview for this. Open the photo in IrfanView and select "Enhance colors..." in the Image submenu (or alternatively press Shift+G).
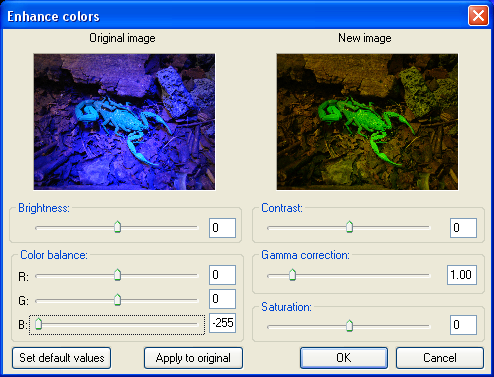
Next, drag the B slider under "Color Balance" in the "Enhance Colors" dialogue window entirely to the left. All blue should be gone from the image. Note that this affect all colors that have a blue component in them as well. However, if you use UV light as the only light source this shouldn't be a problem at all if there is no visible blue present to the naked eye as a result of this light source or if the blue is an undesired side effect of the light source itself.
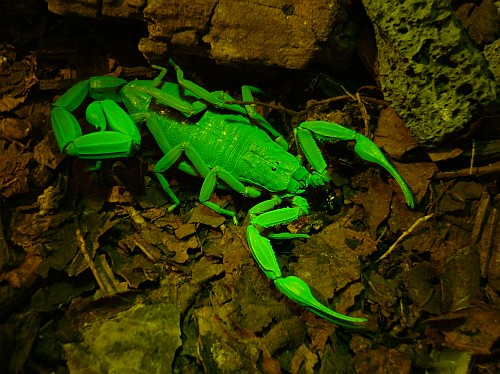
The above photo of a scorpion is identical to the first photo on this page but with all blue removed from the image with IrfanView. The photo is much closer to how the scorpion looks to the naked eye compared to the first one on the top of this page, almost like a plastic glow-in-the-dark toy. Only this one can walk and sting...